DrumPi 2.1.1
The DrumPi manual
Building the hardware, flashing the software, setting up audio, and mapping your kit.
01
Building DrumPi
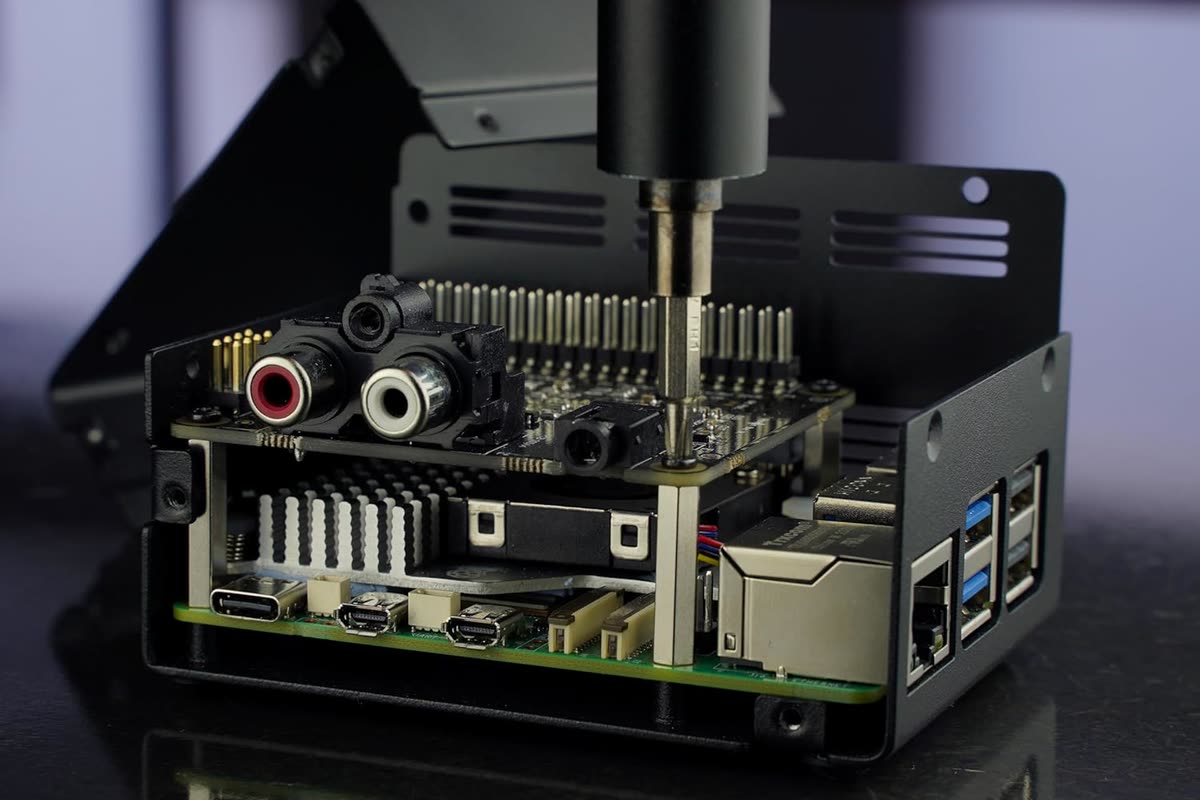
To start using DrumPi you first need to build one — it takes about ten minutes, and there's no soldering.
Hardware
DrumPi runs on commonly available electronics you can find on Amazon or any e-shop of your choice. Here's what you need:
- Raspberry Pi 5, 8 GB
- IQaudio DAC Pro or Raspberry Pi DAC Pro — they're equivalent
- An SD card of your choice
- A case to hold the components
- A power supply
Software
Downloadable from the download section, then written to the SD card with DrumPi Flasher.
02
Installing the software on your SD card
Once the hardware is built, download and launch DrumPi Flasher.
- Select the version to install. Most of the time you'll leave this alone so it downloads the latest.
- Select your SD card adapter. Be careful here — make sure you're choosing the SD card adapter and not another device.
- Set up your Wi-Fi so DrumPi connects to your router on first boot.
- Click Flash, and DrumPi Flasher takes care of the rest.
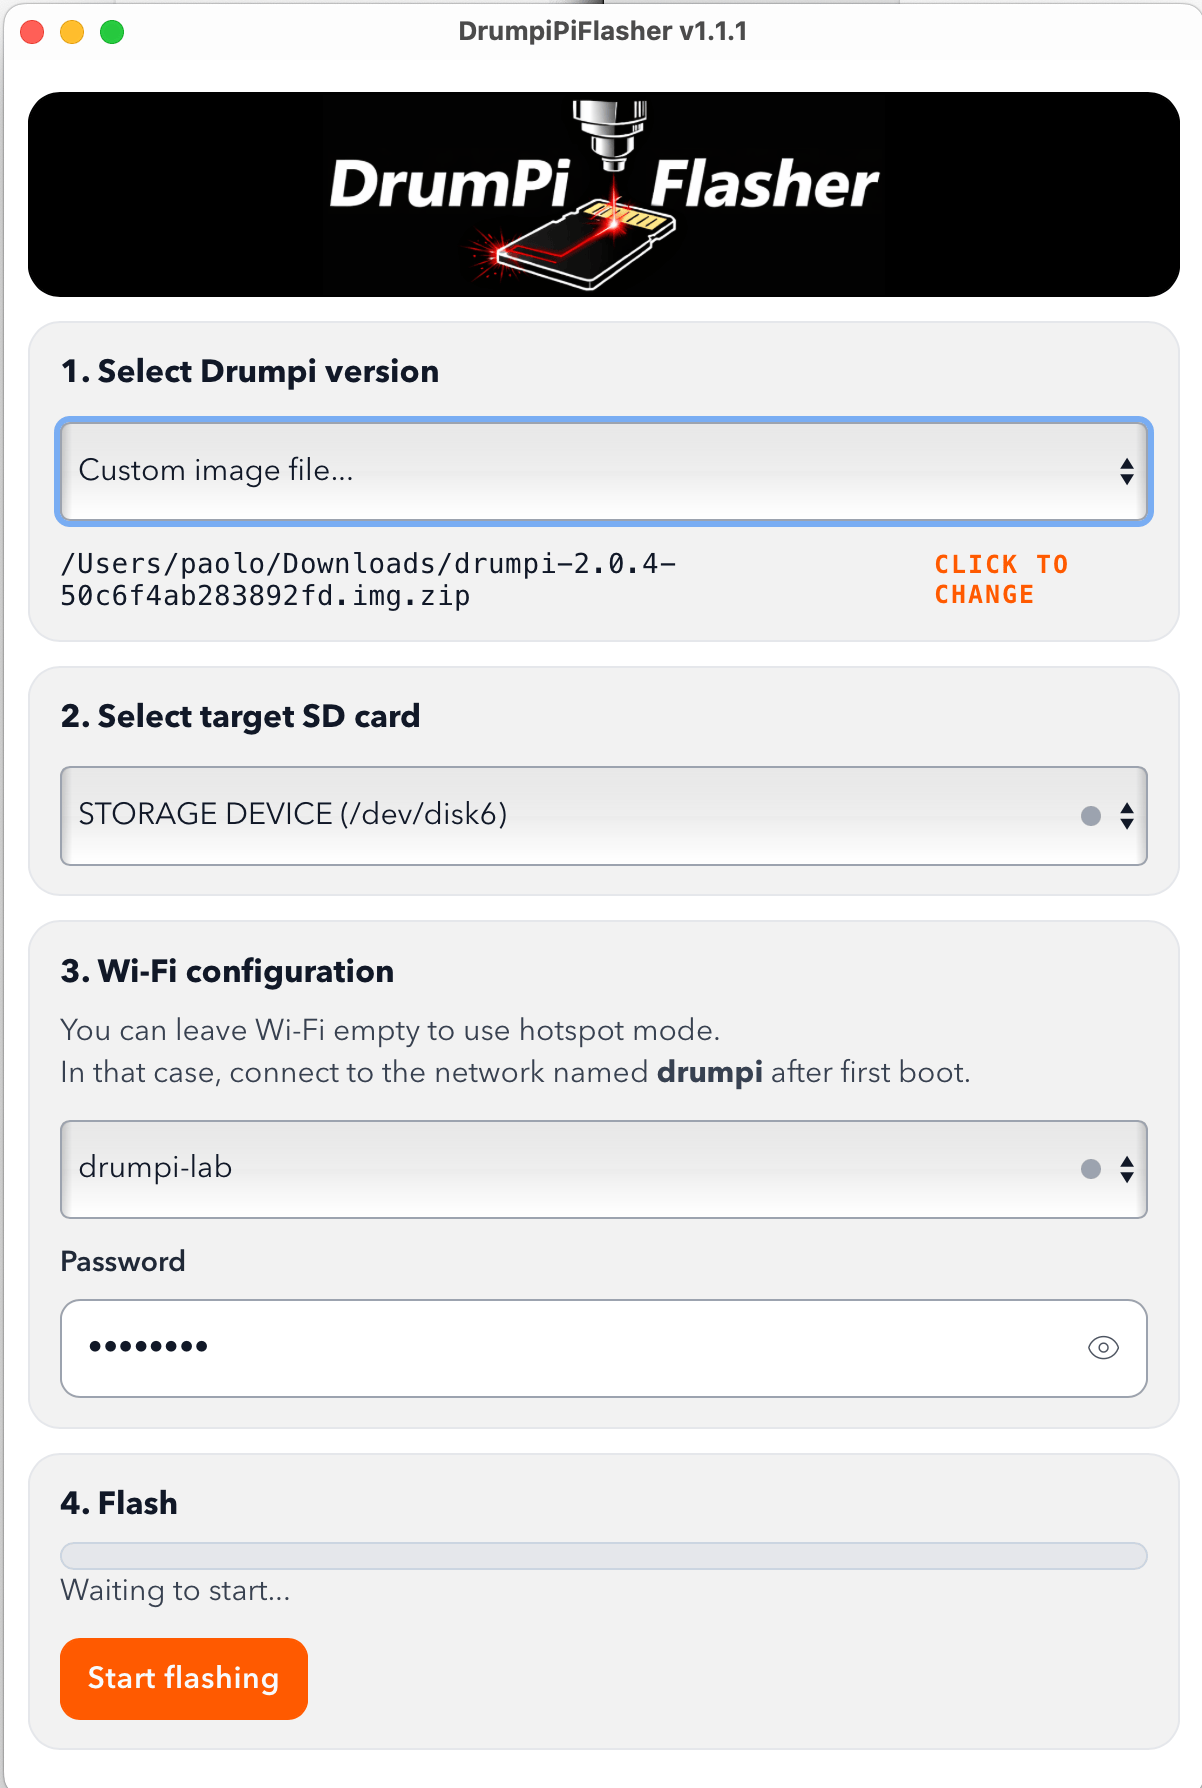
Depending on your internet speed and SD card adapter, the whole process may take a few minutes.
First boot
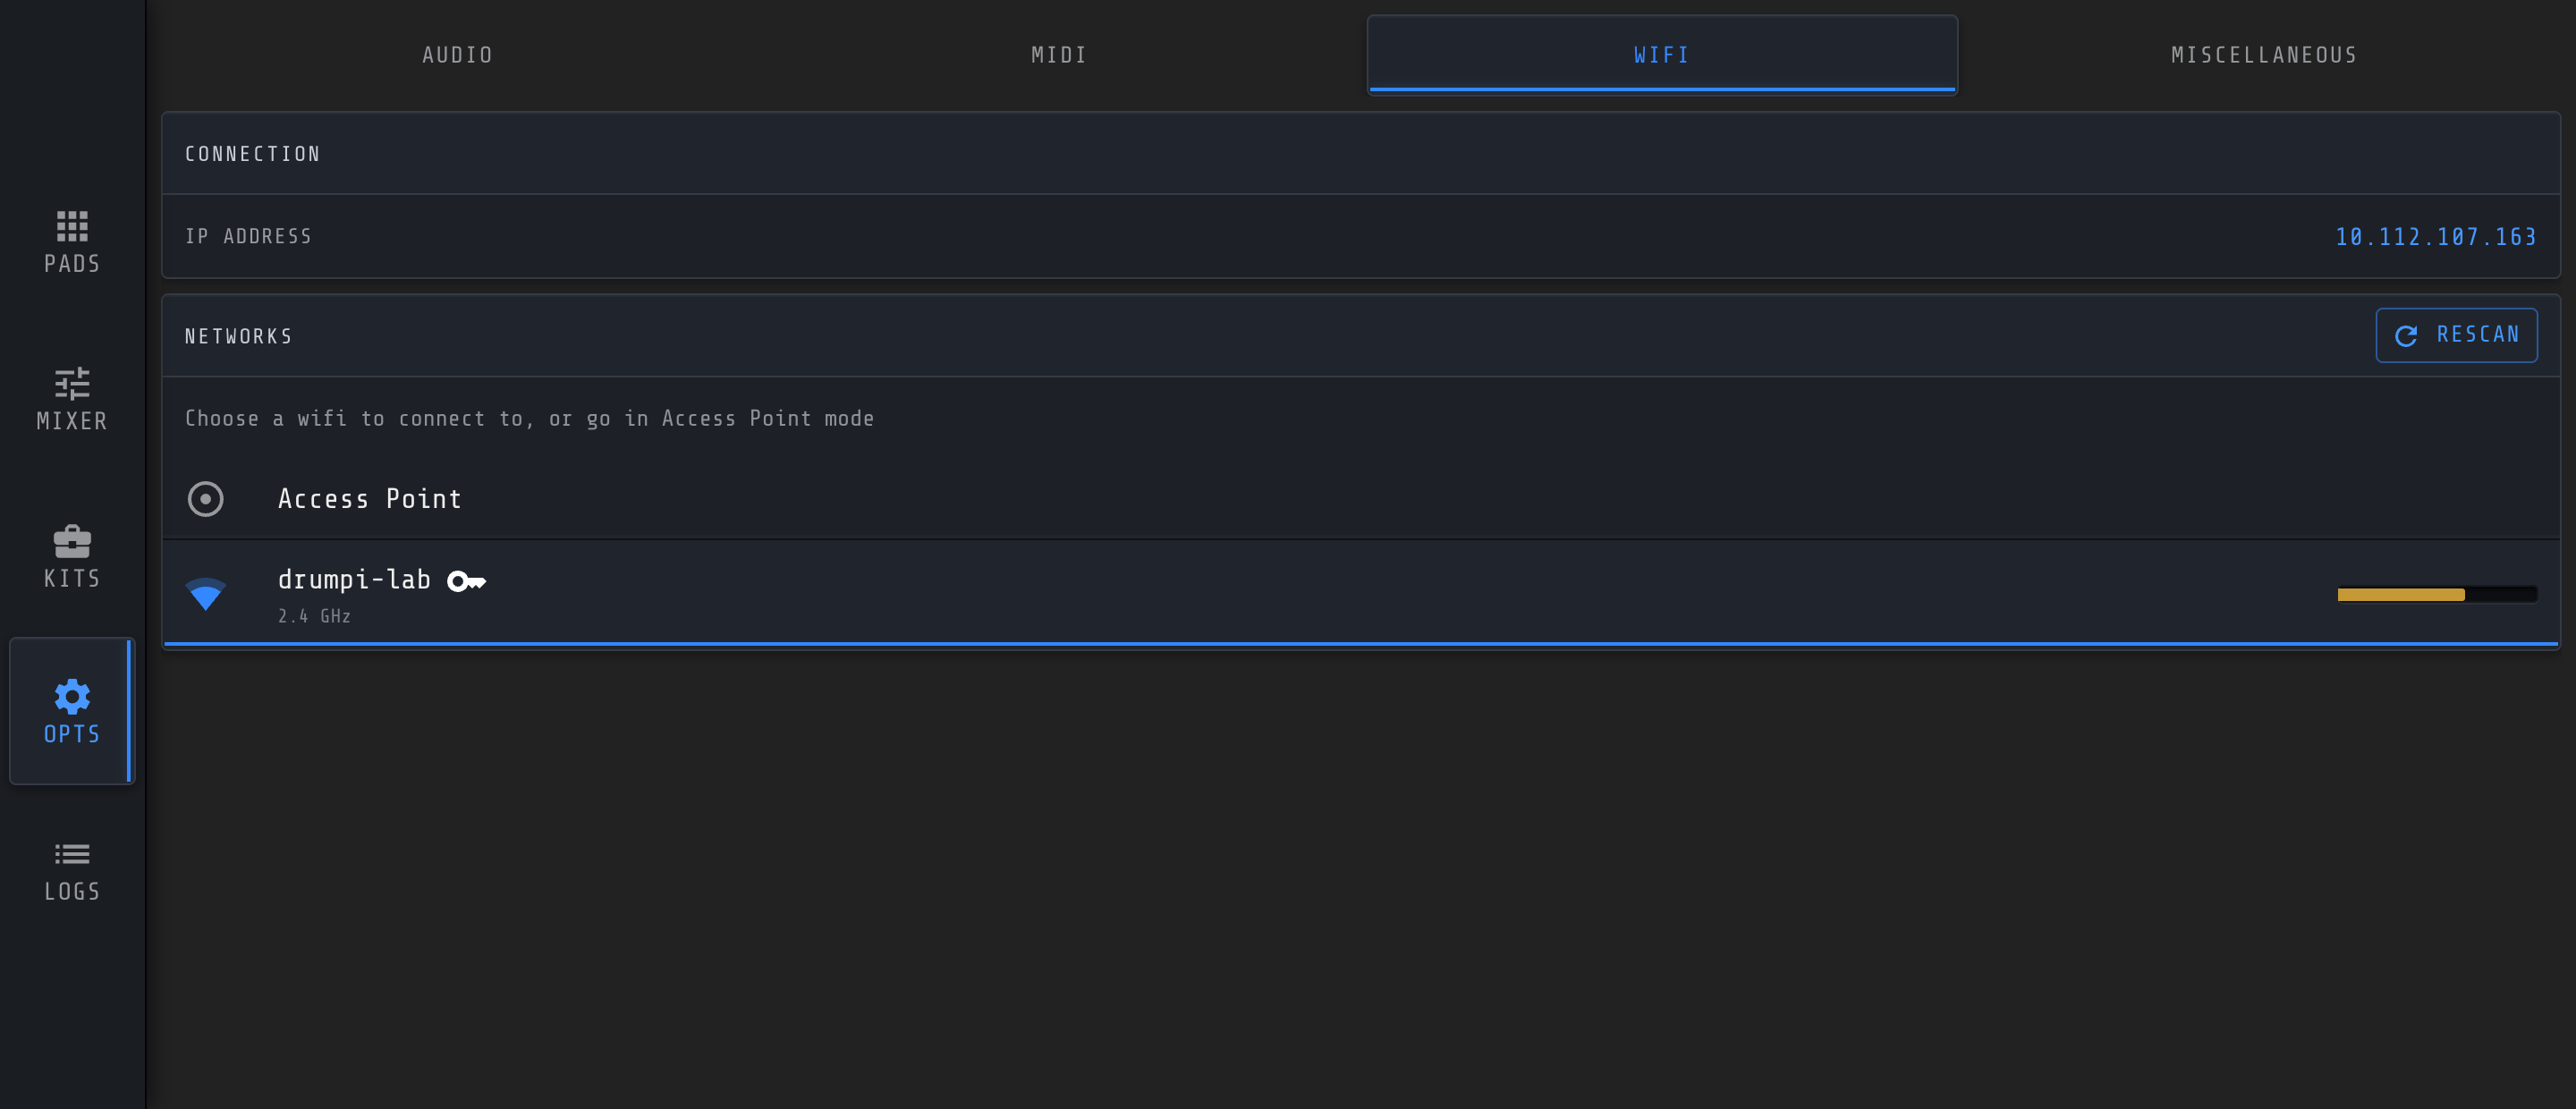
First boot may take a little longer. DrumPi will either connect to your Wi-Fi or, if it can't — or if you selected Hotspot while flashing — create its own network.
- Hotspot network
- drumpi
- Hotspot password
- drumpi1234
- Interface
- http://drumpi.local/
- Fallback address
- 11.42.0.1
Wi-Fi isn't mandatory — DrumPi works perfectly without internet or a router. Connecting it to your home network is just more convenient, since you won't have to switch networks to reach the interface. You can change this later under Options → WiFi; DrumPi then disables its own hotspot and joins the network you picked.
Connect your drum module or MIDI controller over USB and a notification appears in your browser telling you which device connected.
03
Audio device
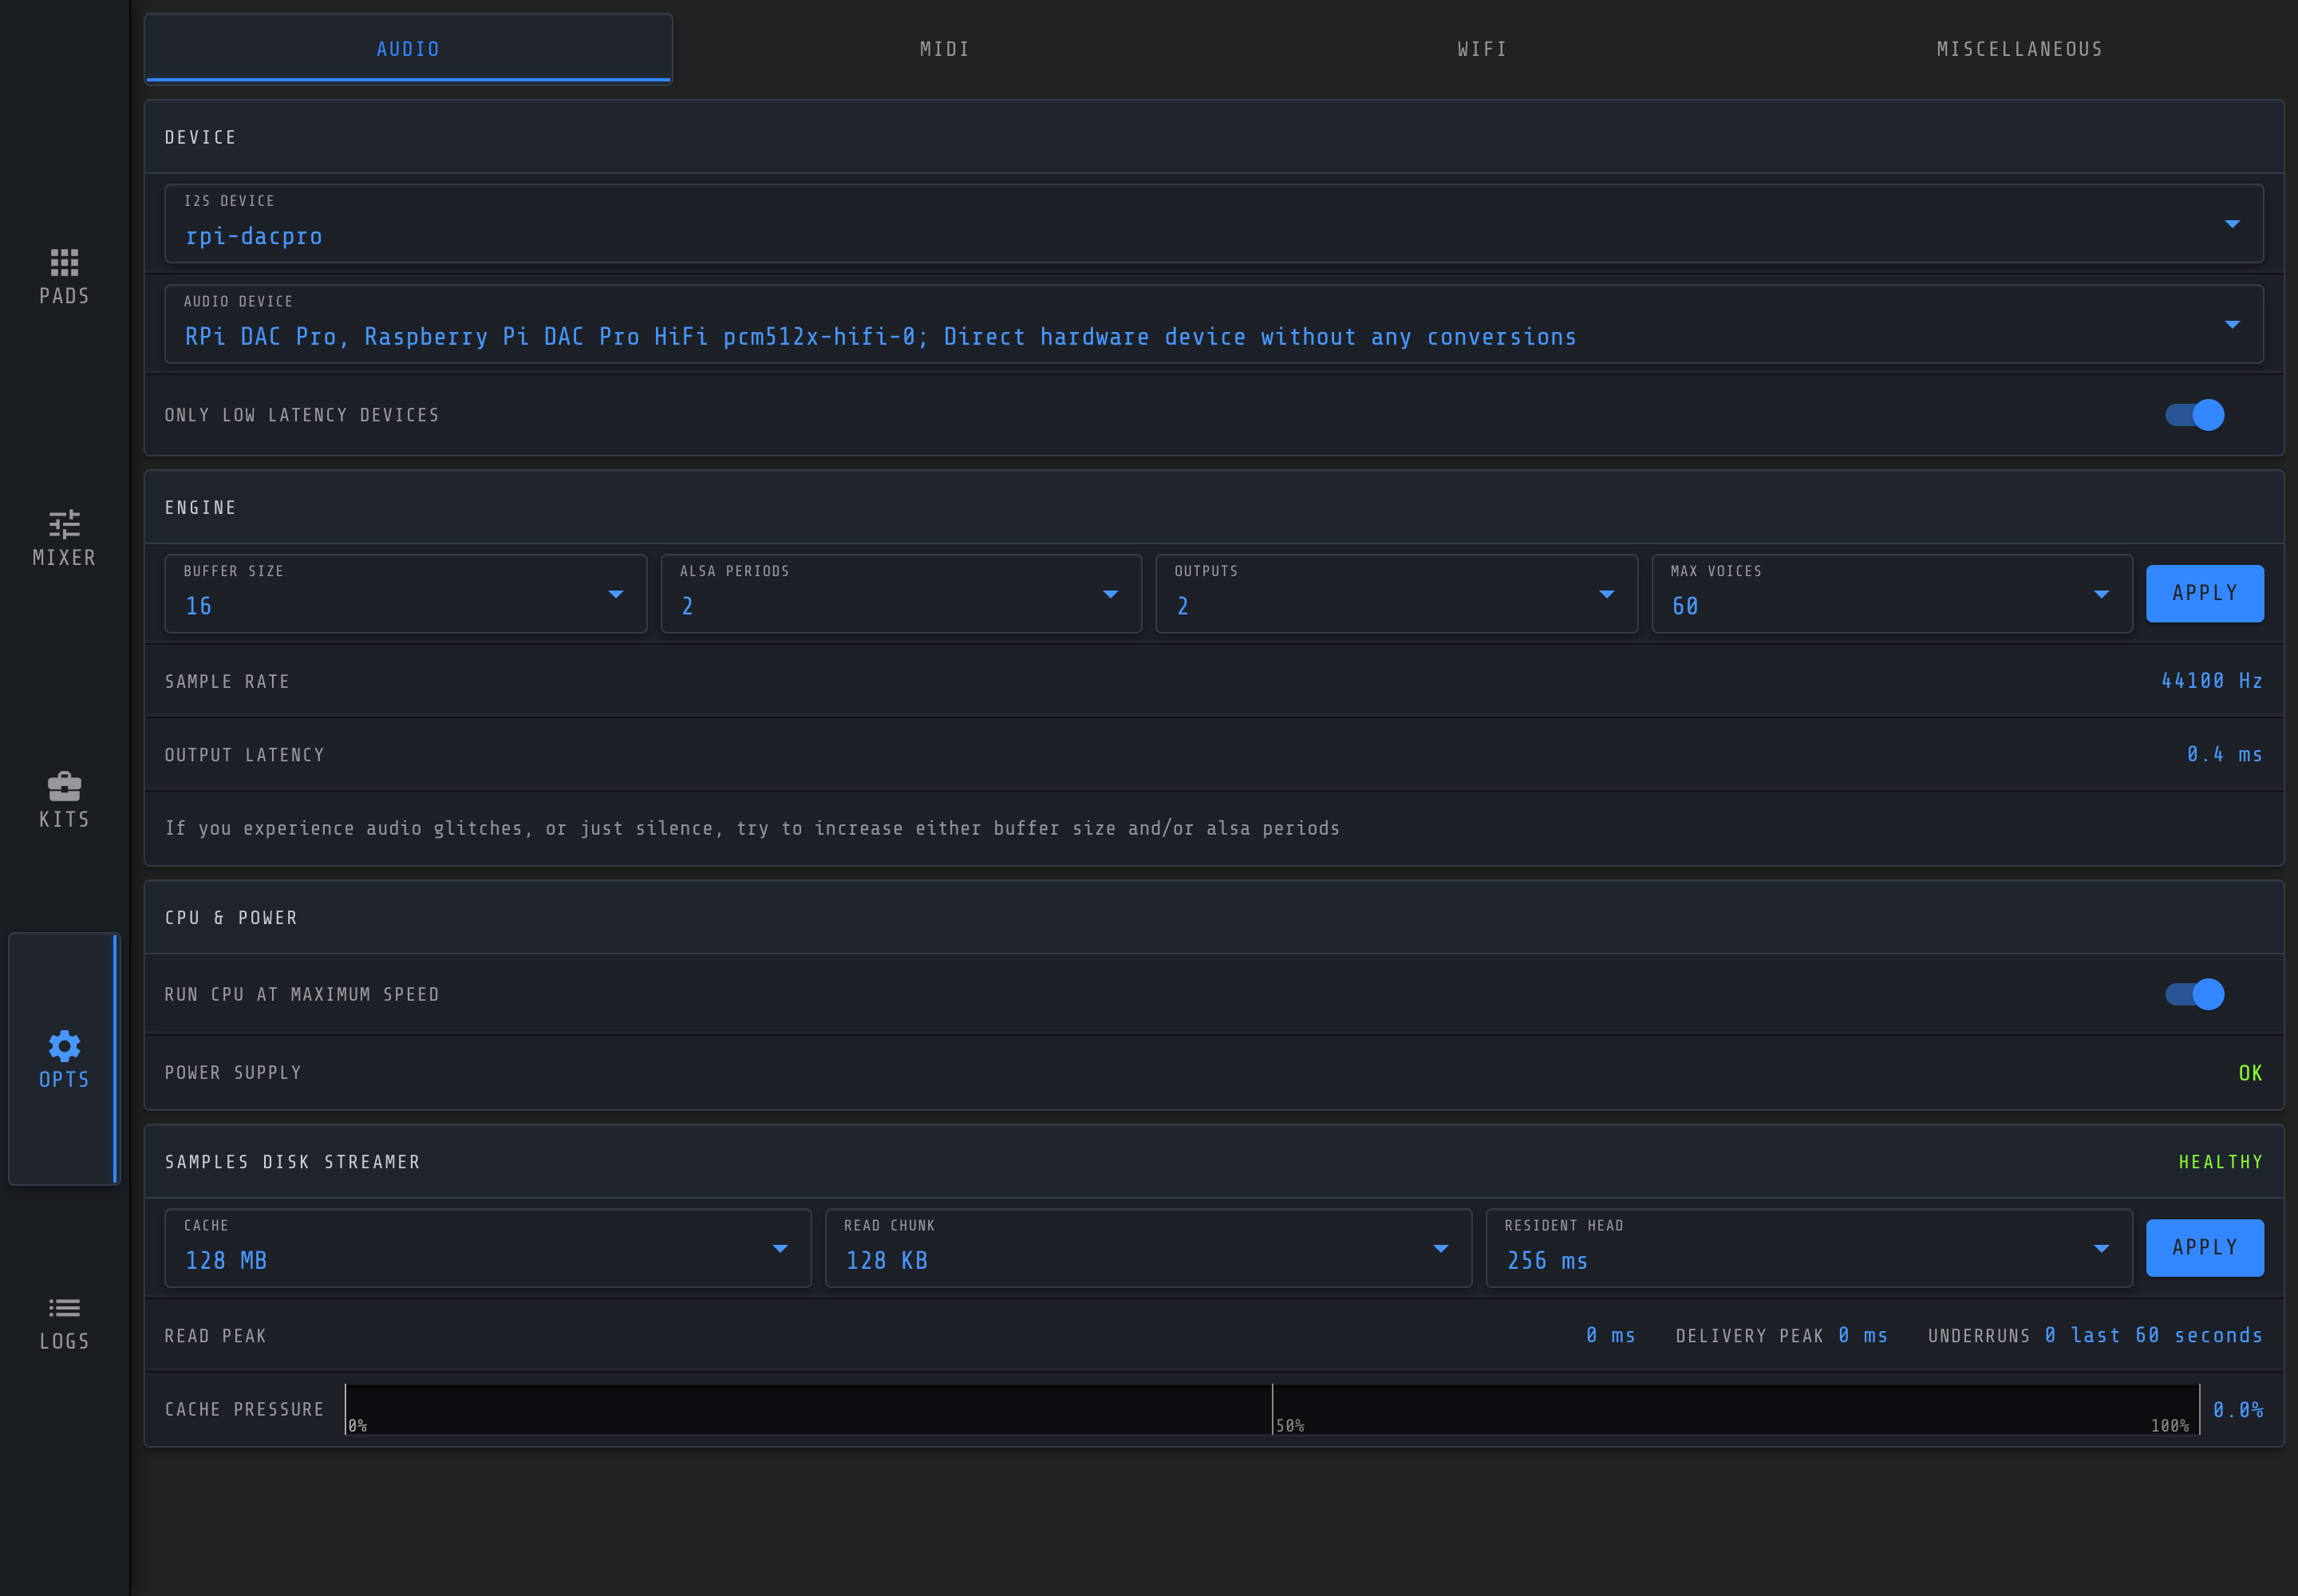
DrumPi needs an audio device to produce sound. If you're using an I²S DAC board — highly recommended — install its driver under Options → Audio.
- Select your audio device driver from the first dropdown. You'll be prompted to reboot to complete the installation.
- After rebooting, pick your DAC board in the second menu. Choose the option mentioning “Direct hardware device without any conversions” — it gives the lowest latency.
- Keep the buffer size at 16 and ALSA periods at 2 to maintain low latency.
- Click Apply. You should hear a beep, meaning the audio device opened successfully.
Why I²S is recommended
It's the only solution that allows a buffer size of 16. Every other option we tested couldn't run that small, and anything above 32 is noticeable and degrades the experience. A USB audio card results in higher latency, and you may need to raise the buffer size and ALSA periods to make it work at all.
04
Mapping sounds
To play a sound, you first associate it with an articulation, and each articulation is linked to a MIDI note. It's a two-step process:
- Link a MIDI note to an articulation.
- Assign a sound to that articulation.
This indirection means that changing the MIDI note for an articulation updates every kit using it — change the note mapped to a snare articulation and all your kits follow, with no per-kit editing.
Articulations
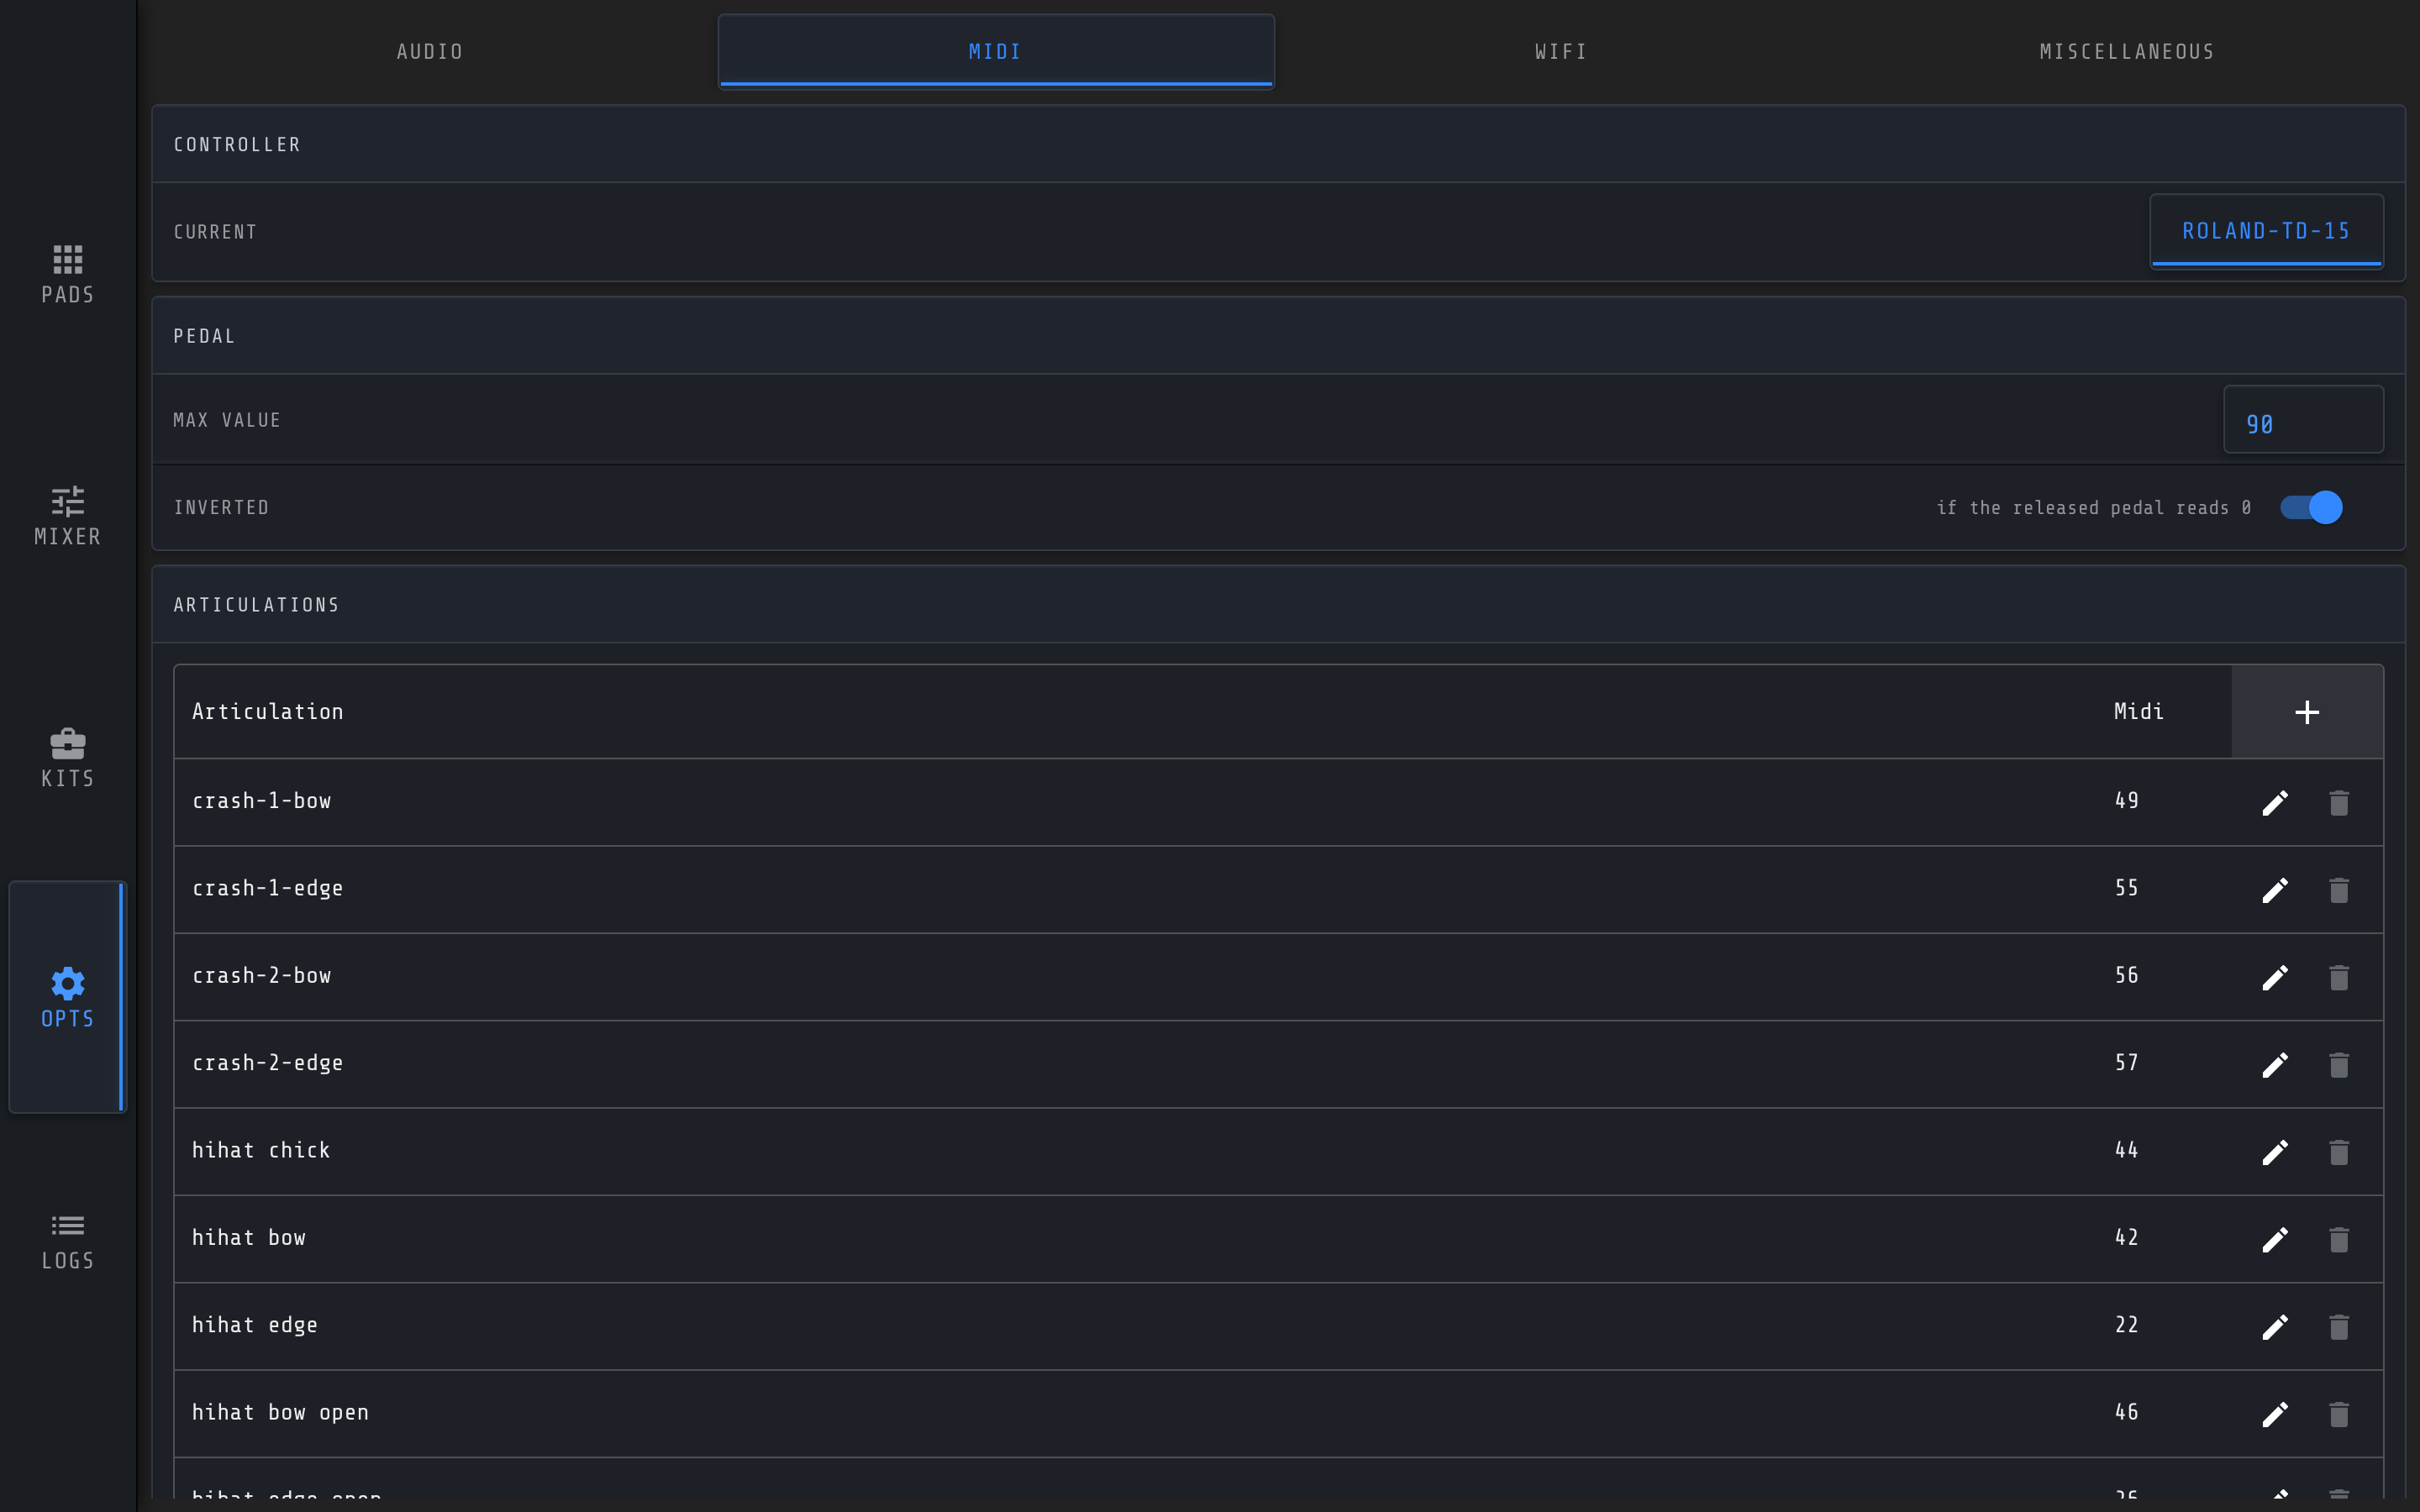
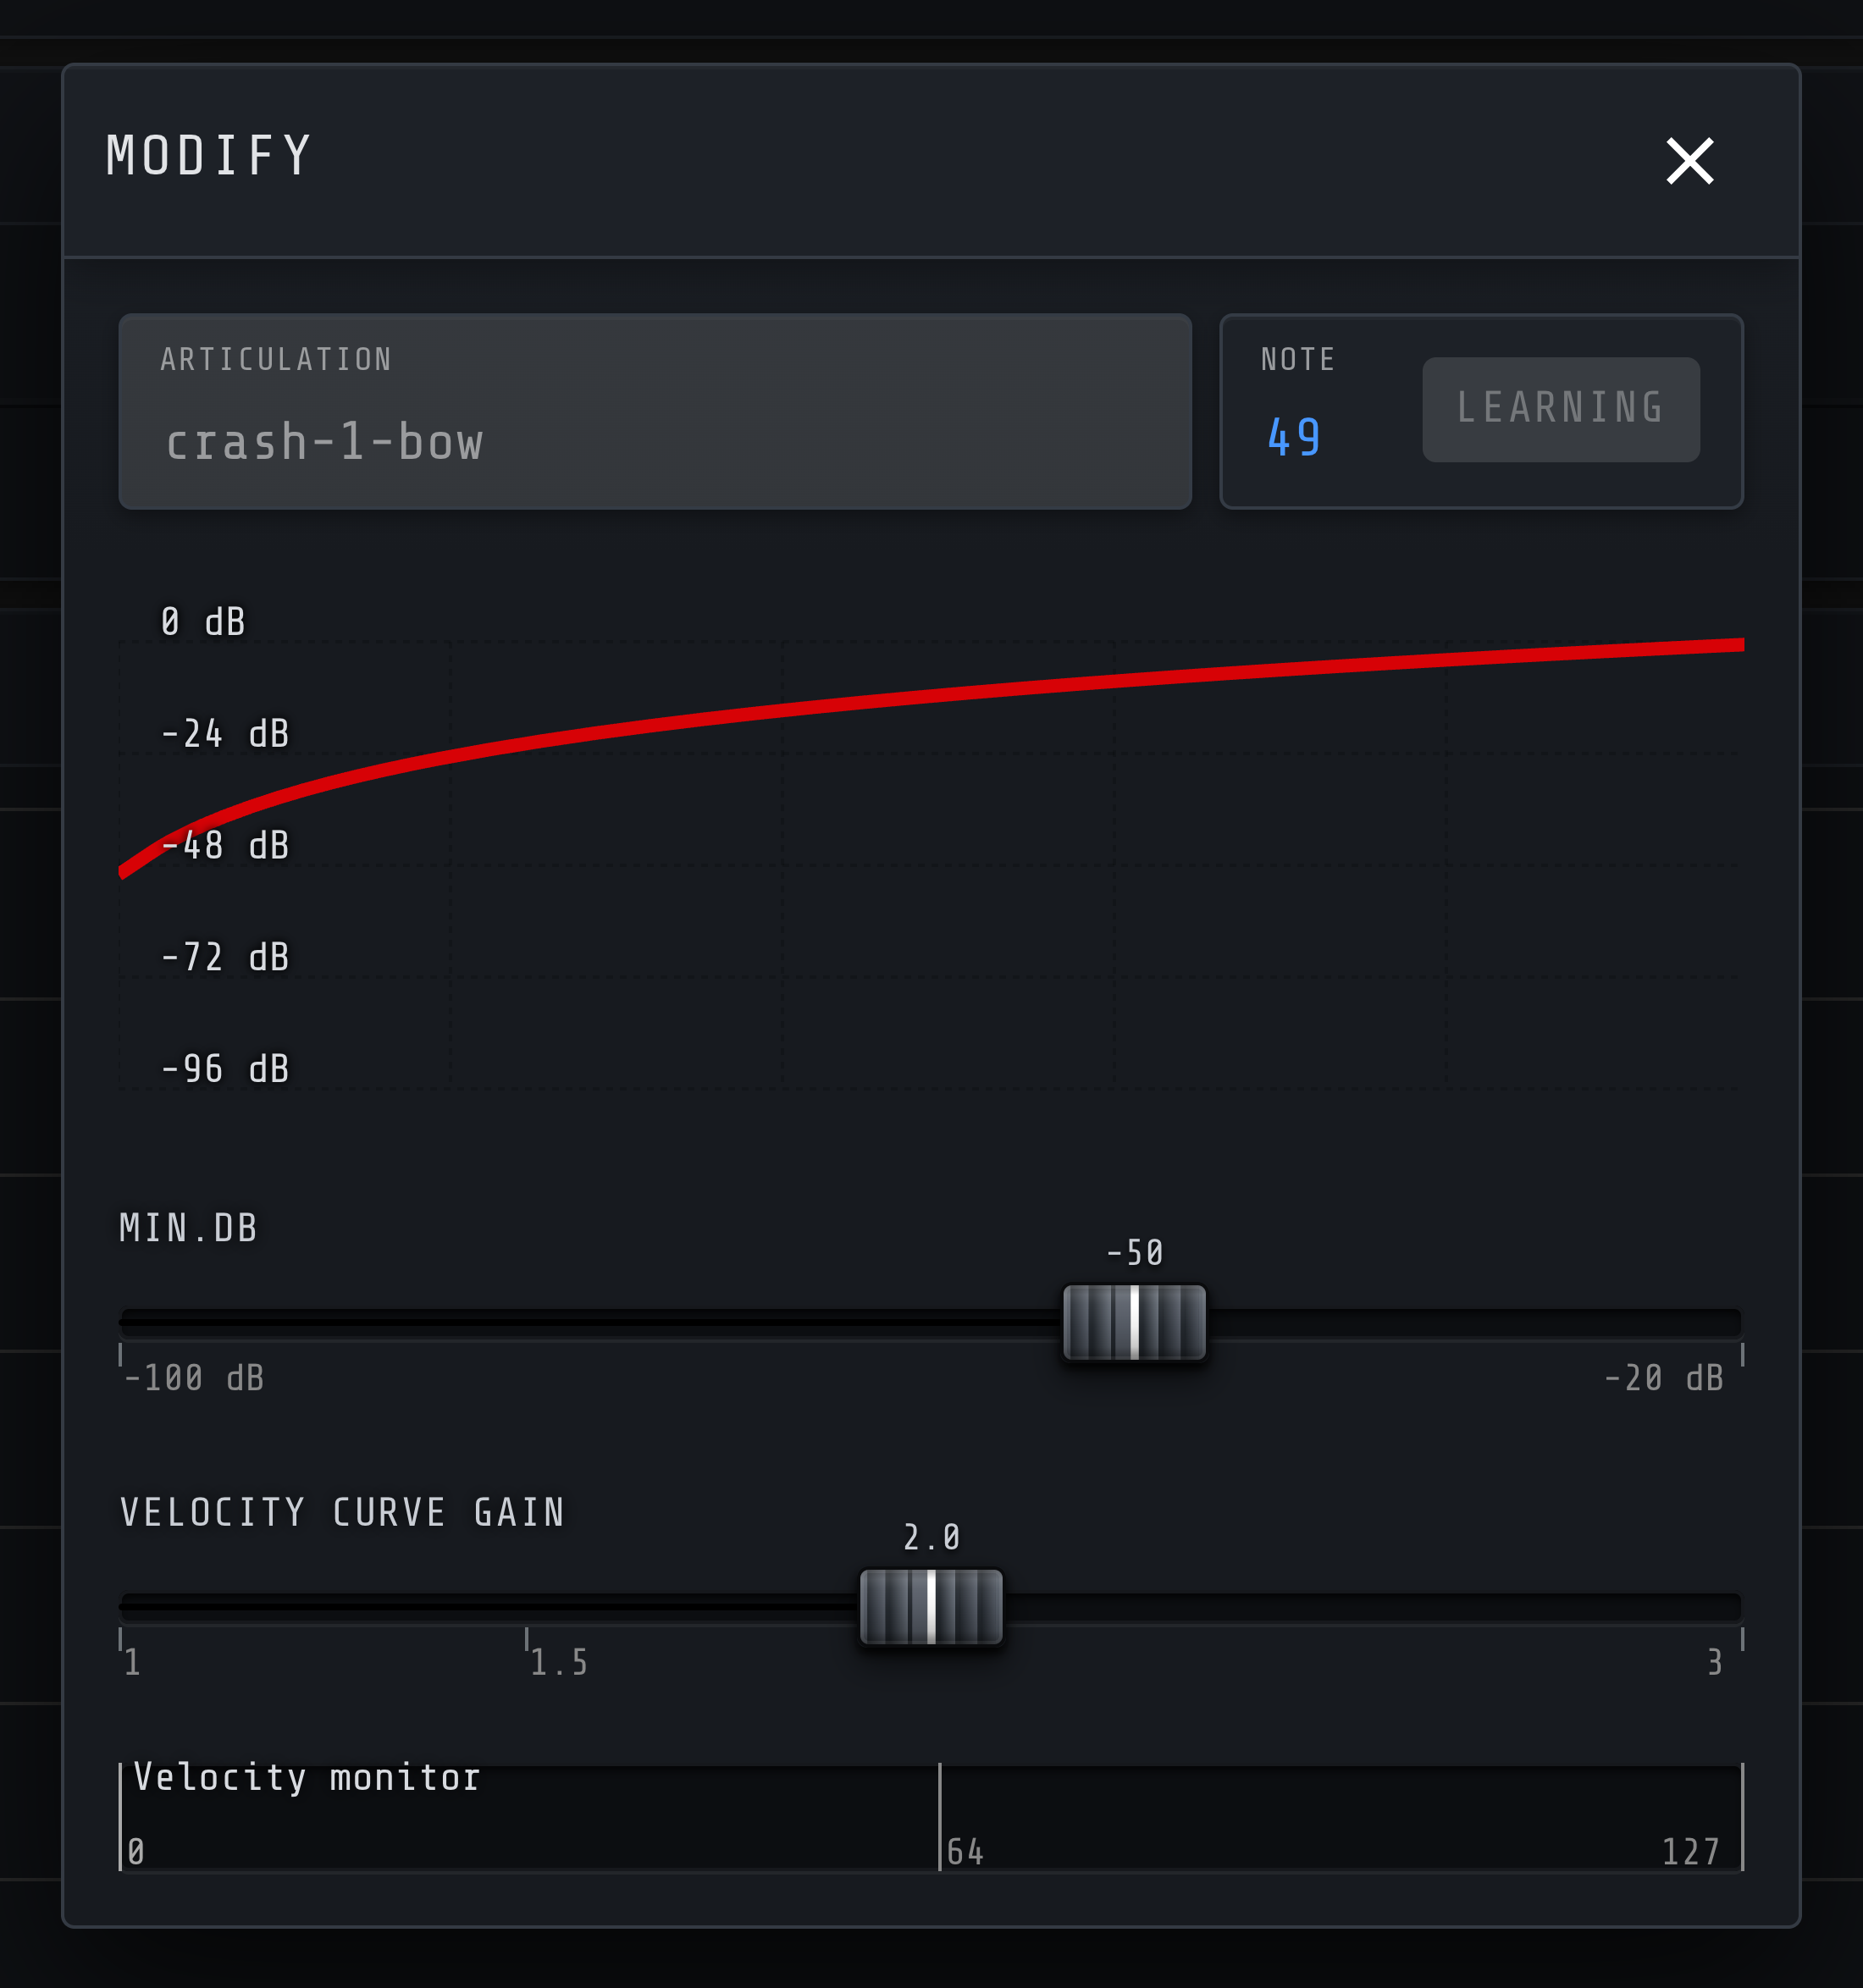
Go to Options → MIDI to edit articulations or build a custom list for your controller. There's a set of default articulations you can't delete or rename; click + to create your own. The pen icon lets you change the assigned MIDI note and its velocity curve.
Velocity Curve Gain changes how the pads respond. 2 is standard, and the useful range is 1 to 3. If a snare feels too hot, raise the gain; if you want more attack and responsiveness, lower it.
MidiPads
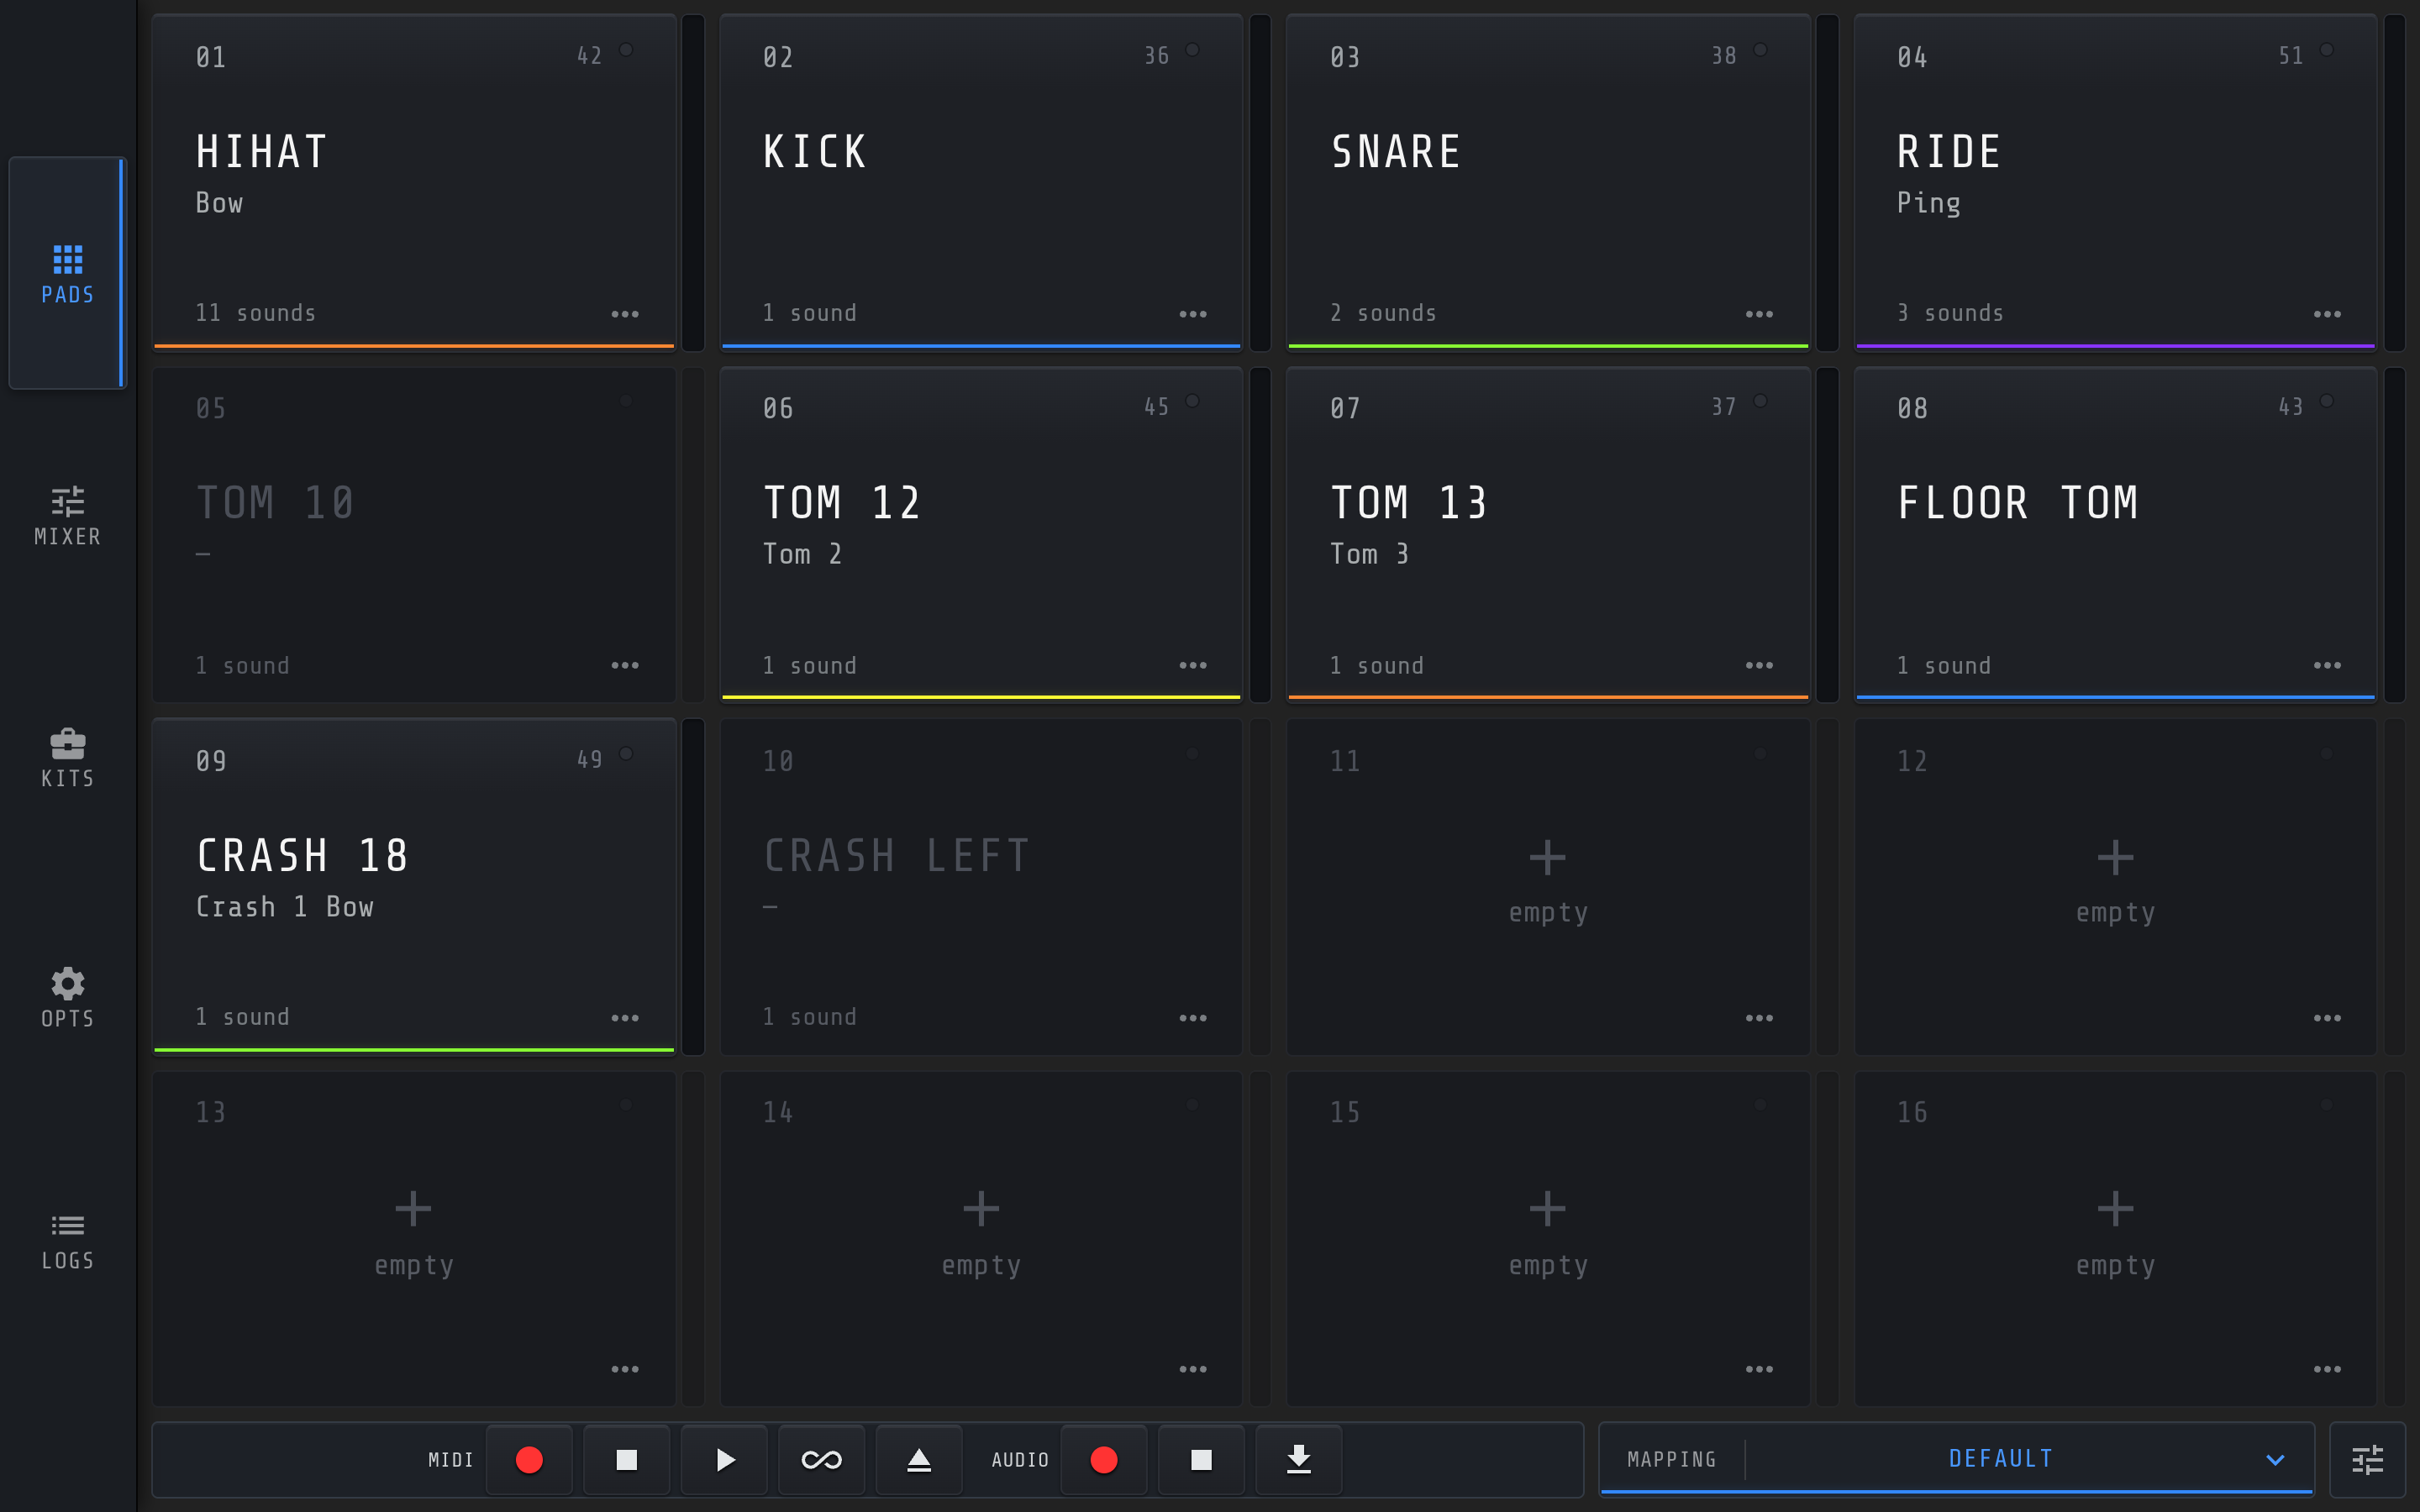
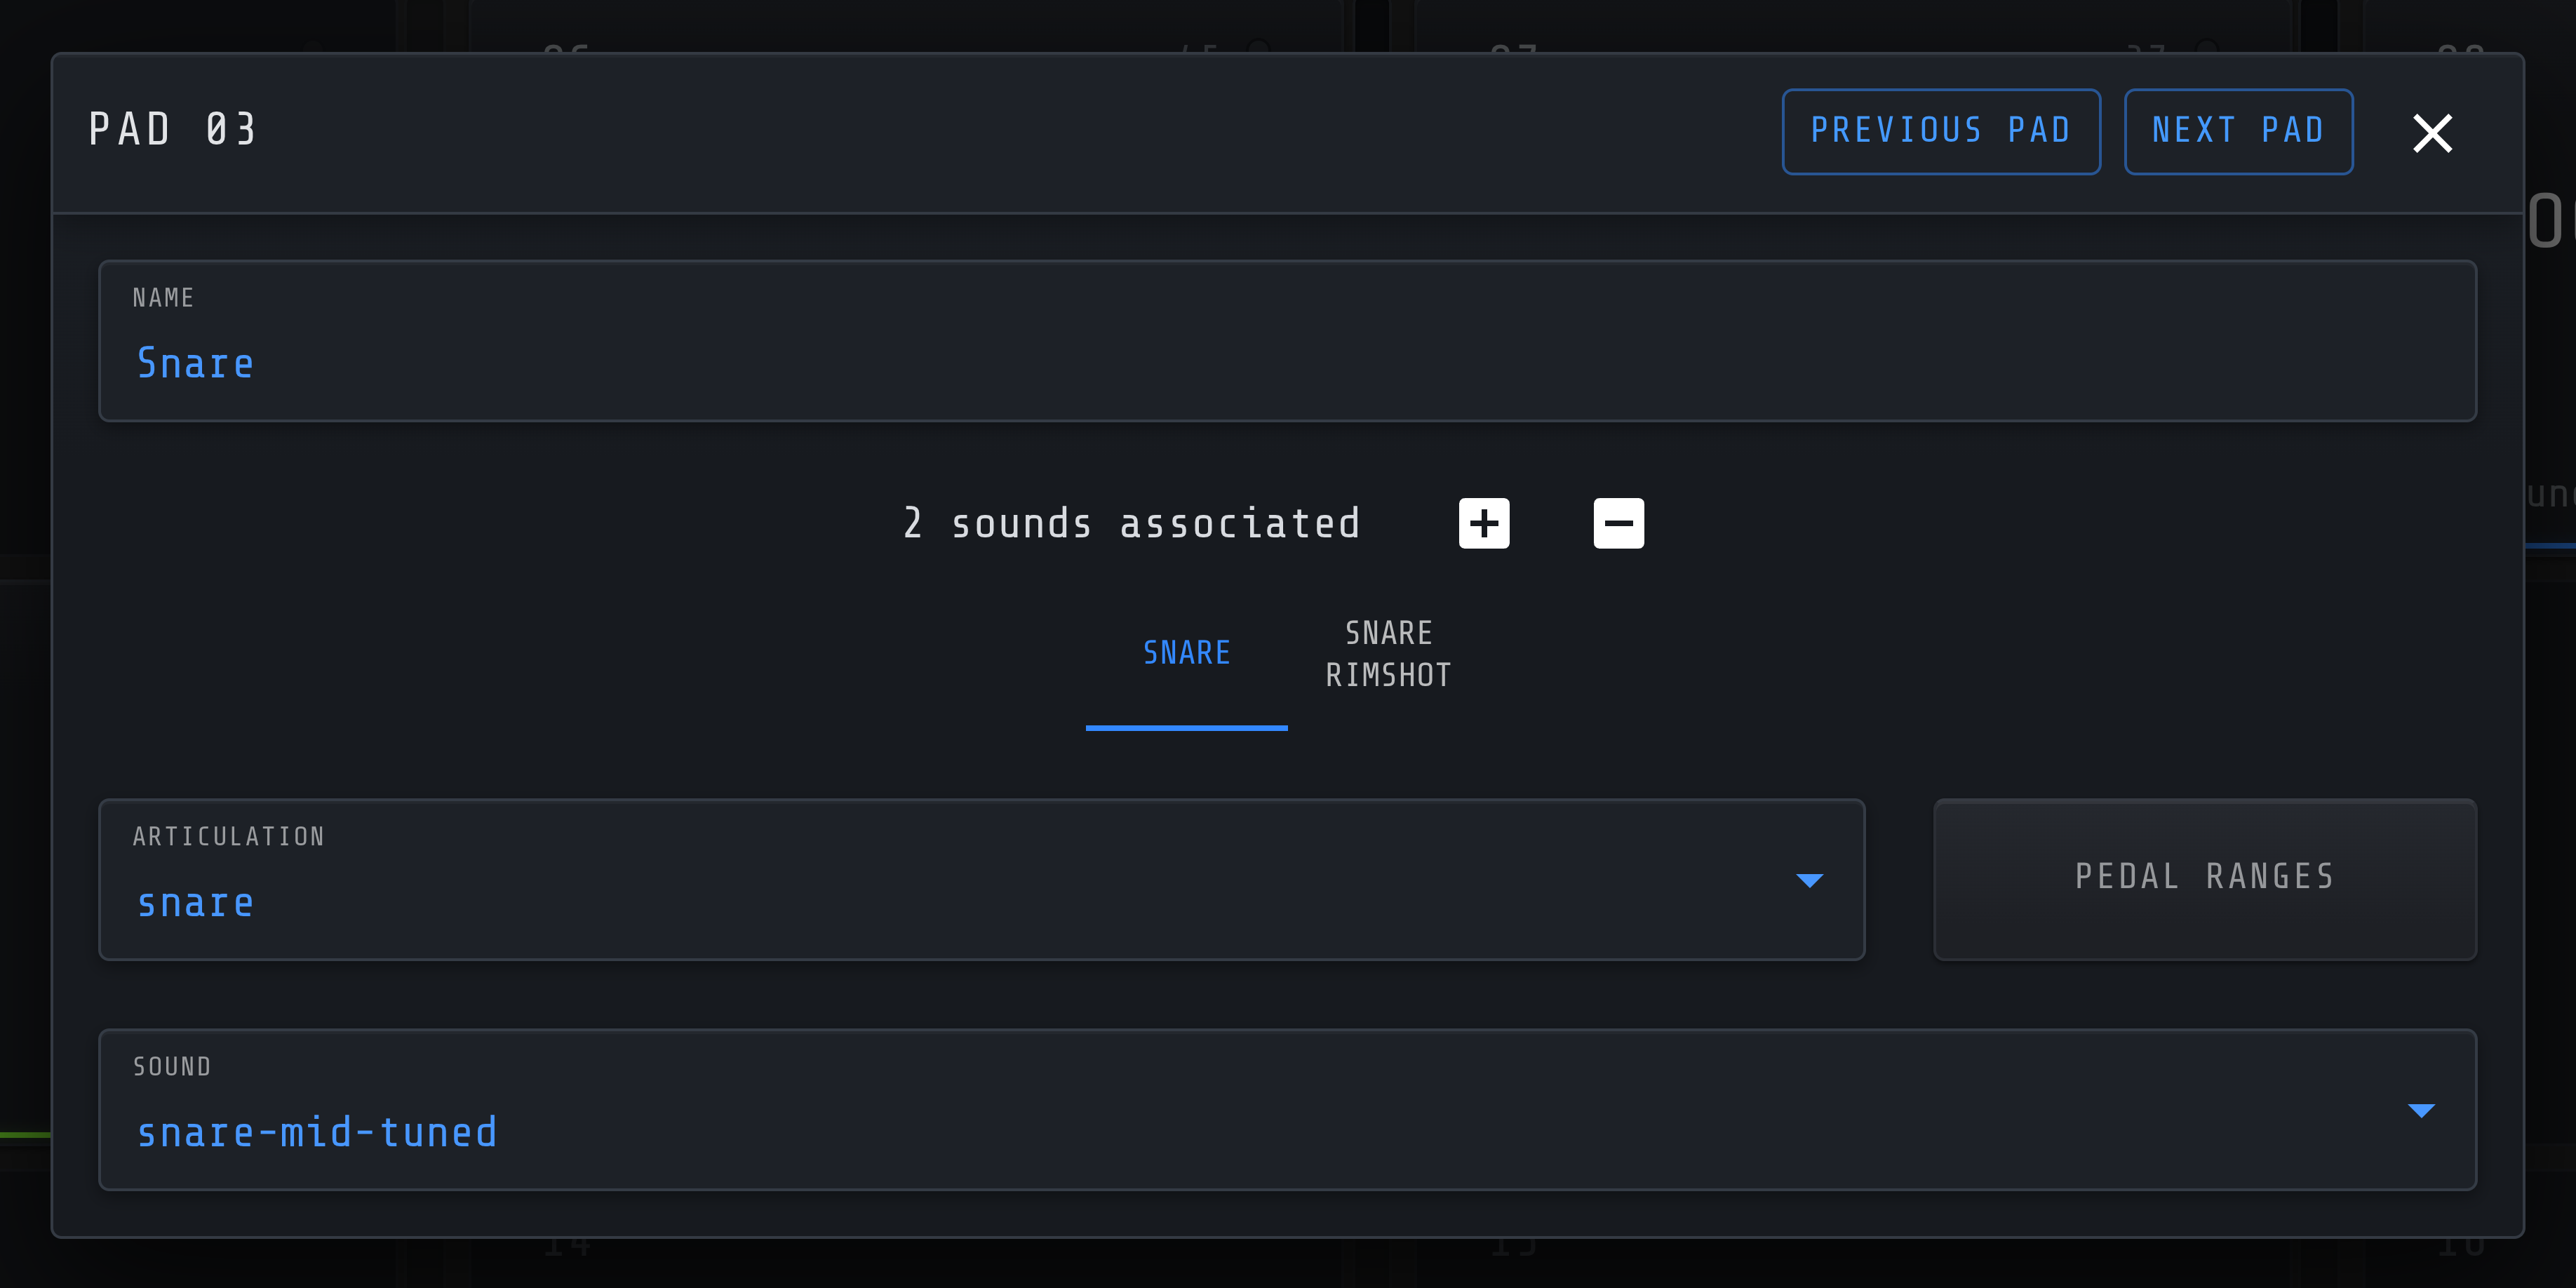
A MidiPad represents a physical pad, and can hold more than one sound — a snare might have centre, rimshot and cross stick on one pad. Open its configuration with the ⋯ button that appears on hover, or press and hold on mobile, then use + and − to add or remove sounds.
05
Hi-hat
The hi-hat is the fiddly one: as well as bow and edge sounds, the pad has to change sound with the pedal position. Rather than mapping an articulation straight to a sound, you map a range of pedal positions to a sound — 0–15 triggers the first sound, and so on. Turn this on with the “pedal ranges” button.
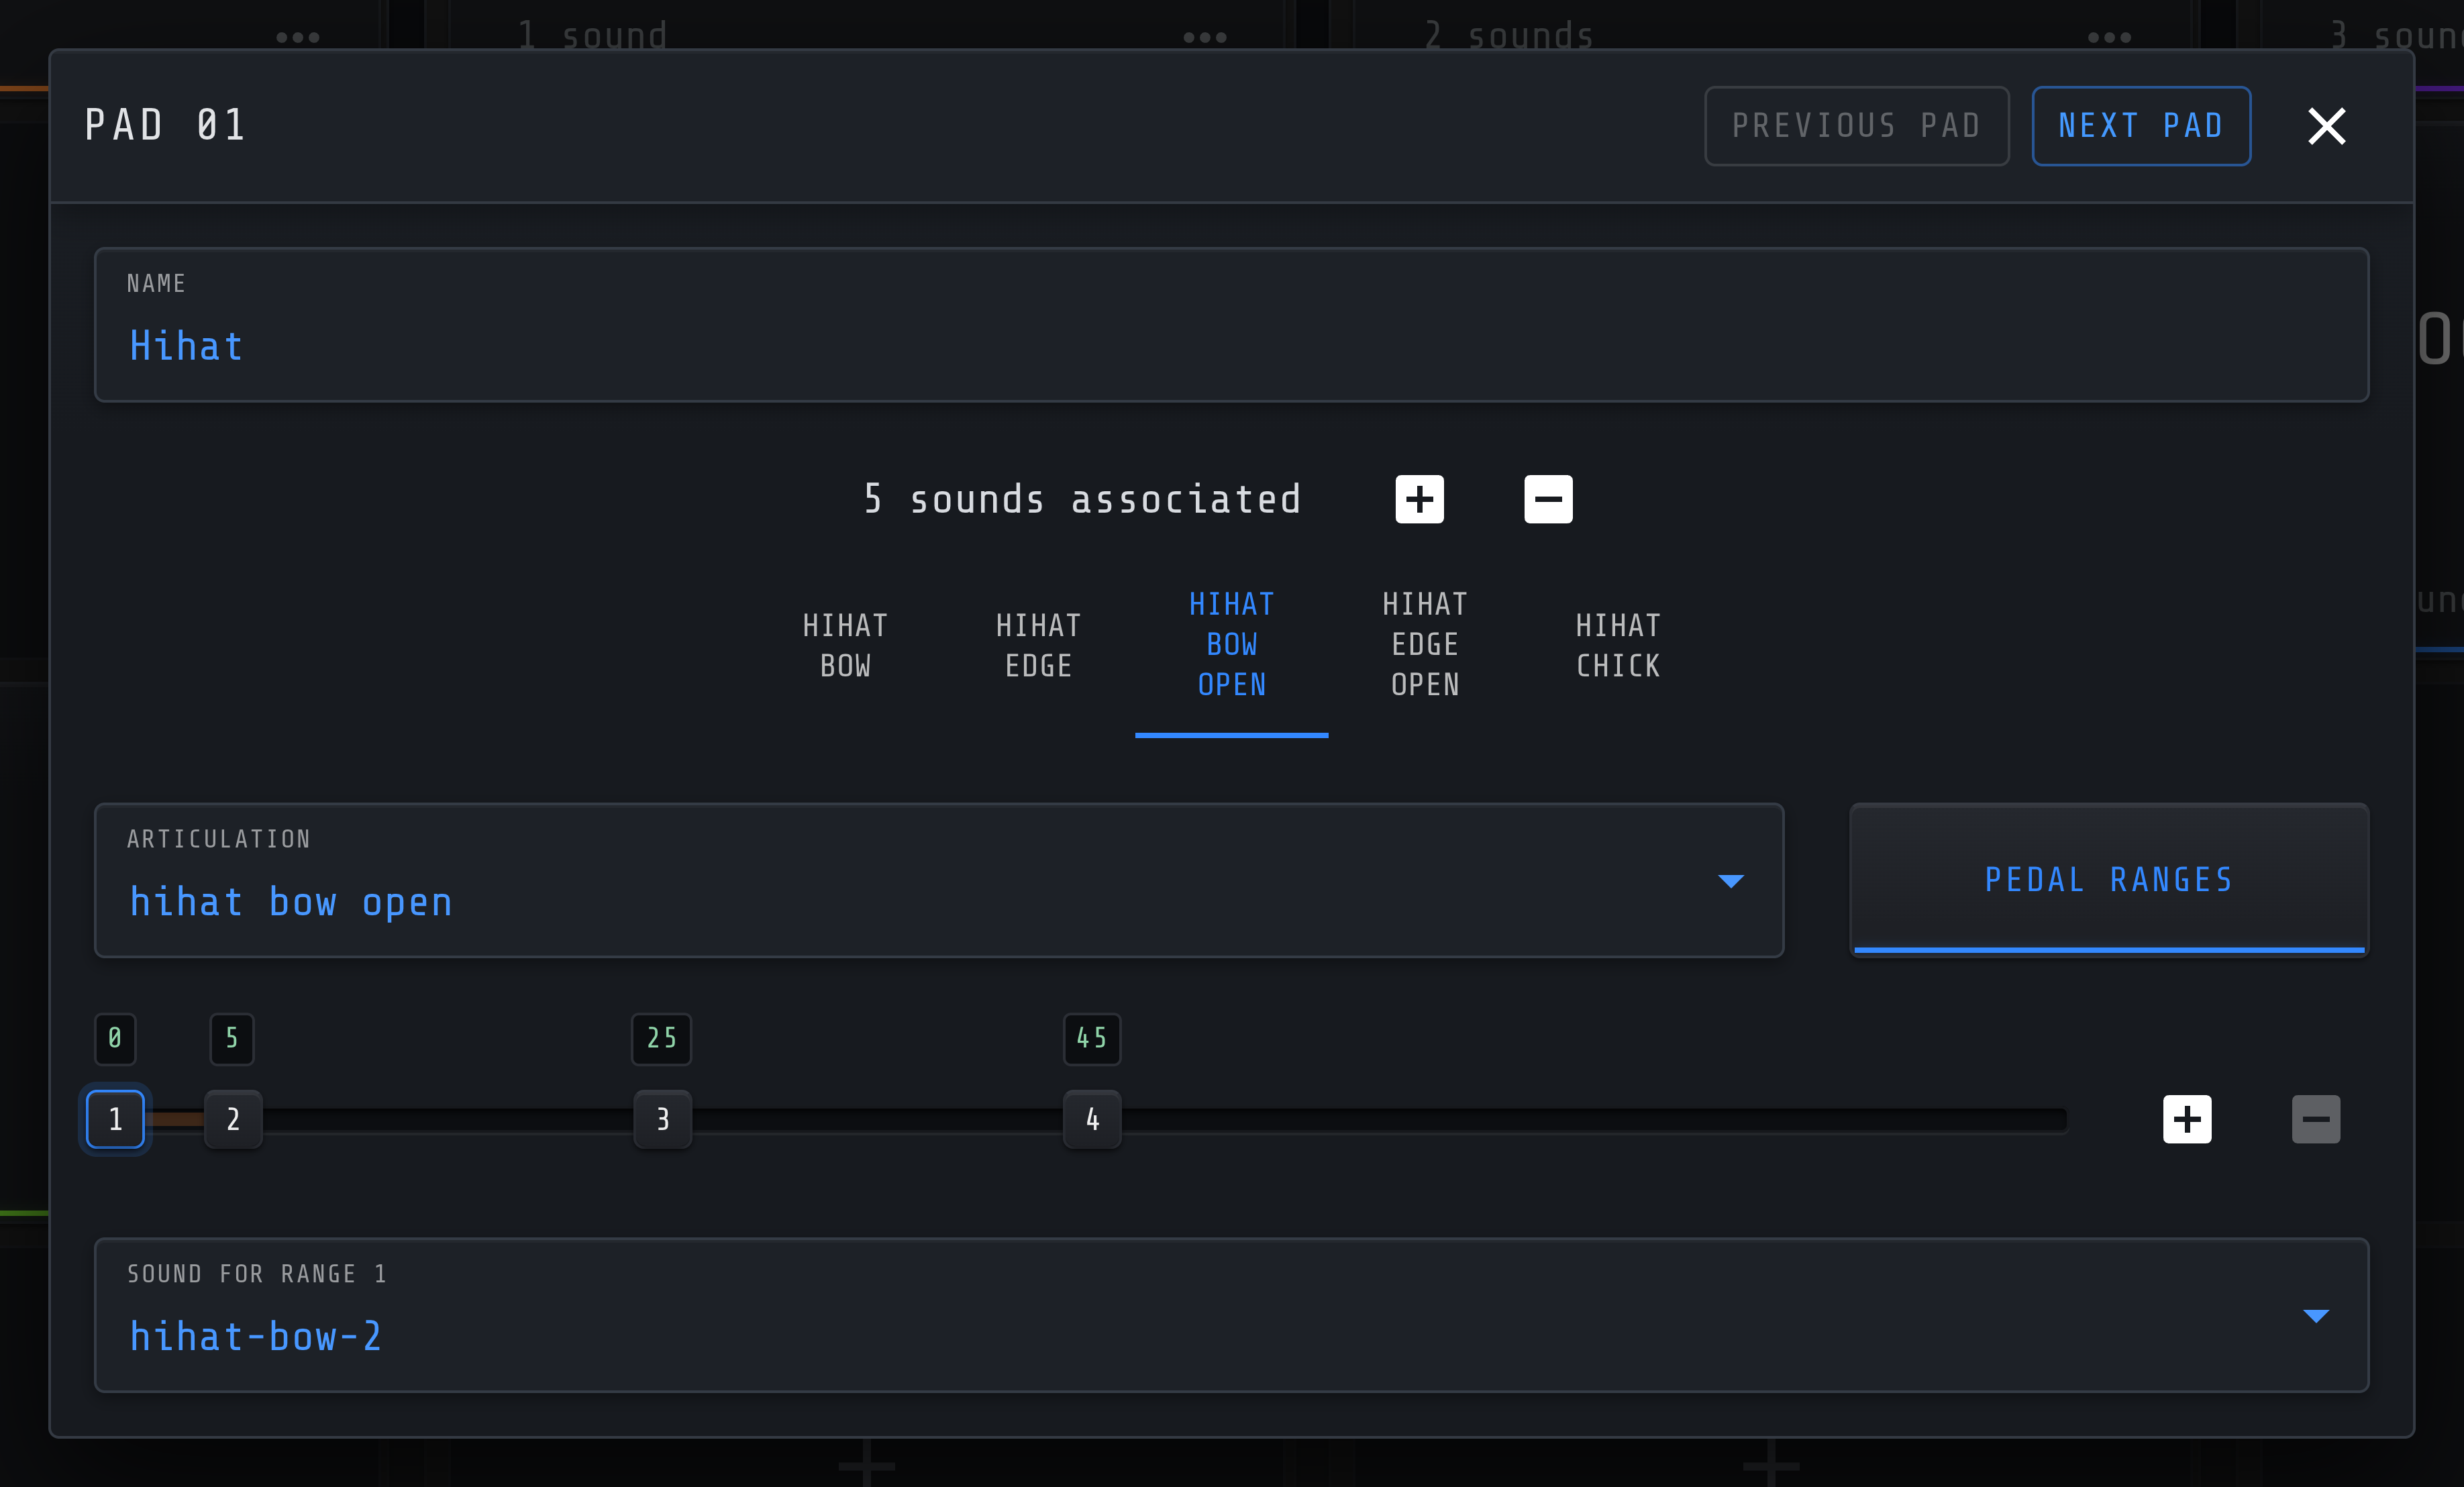
Roland-compatible modules
Five MIDI notes, and therefore five articulations, are involved:
- 42
- Bow, pedal extra tight
- 22
- Edge, pedal extra tight
- 46
- Bow, across the pedal-opening ranges
- 26
- Edge, across the pedal-opening ranges
- 44
- Chick
Non-Roland-compatible hi-hats
If your module — most Alesis models, for instance — doesn't send separate notes when the pedal is fully closed:
- Remove the first two notes you assigned.
- In Pedal Ranges, add a new range for the tightly-closed position.
- Reassign the sounds mapped to the bow and edge closed notes to the two new ranges.
06
Bill of materials
Components for a complete DrumPi setup.